Prototype Test 1
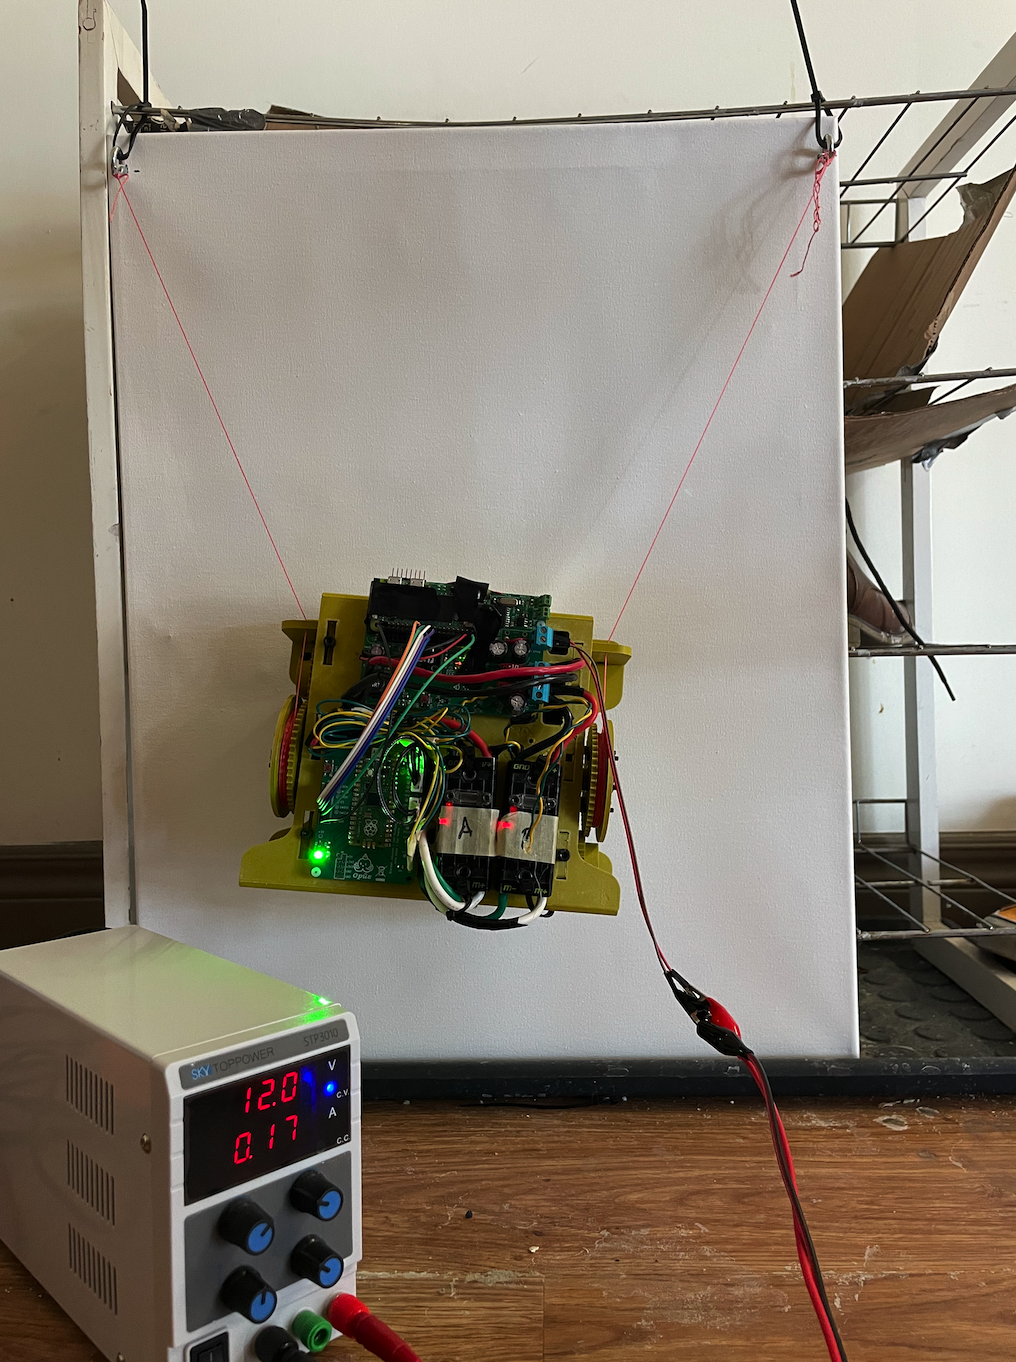
We connected the electronics, mounted them on the chassis and mounted the robot on two hooks at corners of a canvas. With some troubleshooting, we were successfuly able to move the robot! Both motors can reel the rope in and out at arbitrary speeds. Now, we can use this platform to develop the control algorithm. Our plan is to make a manually driven mode that can be used with a controller to get an intuitive feel for the dynamics and capabilities of the platform as well as to reset the position of the device between subsequent trials of the control algorithm.
Note the duct-taped on Raspberry Pi, and the absence of fuses on the main control board. These were done to accelerate our testing as we await some parts from Digikey (fuse holders, a 40 pin female header for the Pi). We will add these when they come in!
Next Steps
- Software: Make easier manual control mode for further testing
- Test automatic controller algorithm and tune as necessary
- Attach and test painting mechanism